Hey guys, if you’re here because you’ve got a FUJITEC or Fuji elevator car part that needs swapping, you’re in the right spot. I’ve been selling OEM and high-grade compatible FUJITEC/Fuji elevator car parts for over 7 years now, and let me tell you—90% of the "horror stories" I hear from installers happen because they skip small, critical steps. These lifts aren’t just big metal boxes; they’re precision gear that moves people (and sometimes equipment) dozens of feet up every day, so cutting corners here is never worth it. Today, I’m breaking down the actual, no-BS steps we send all our install guides (the ones our premium customers get, not the generic junk online) for getting these parts mounted right. Elevator Parts for FUJITEC/FUJI
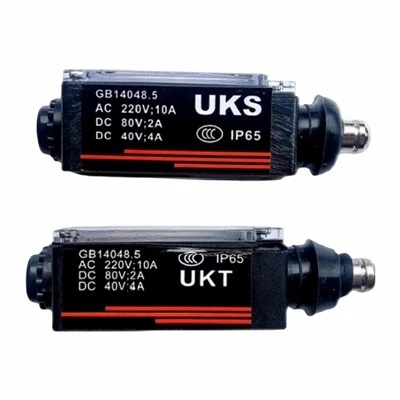
First off, let’s start with the pre-install prep that no one talks about enough. Before you even grab a wrench or turn a screwdriver, you gotta do two big things. First, verify the part you got matches exactly what you ordered. I can’t tell you how many times a customer will DM us saying "the panel you sent is wrong" only to realize they ordered a 2022 model H-III car operating panel and got a 2019 one—same line, slightly different mounting holes. Pull up your elevator’s model number, serial number (it’s on the car top controller, usually a metal plate tucked near the light fixture), and cross-check every part’s specs with your order confirmation. If something’s off, shoot our team a message before you start—we swap out wrong parts fast, no hassle. Second, lock off the elevator. This is non-negotiable, not a "pro tip"—OSHA and every safety board out there requires it. Grab your lockout/tagout padlock, turn the main power at the hoistway top and the car top disconnect to OFF, hang a "DO NOT OPERATE" sign, and have your partner double-check that the car isn’t moving. I’ve seen installers get injured because they cut this step once—don’t be that guy.
Next, step one: Prep the car interior mounting surface. Most FUJITEC car parts—whether it’s the car operating panel (COP), floor indicator, button panel, or even the speaker grille for intercoms—mount to either the plastic/metal trim on the car wall or the dedicated backplate they make for each model. First, remove the old part carefully. If it’s a COP, pry the outer trim cover off (use a plastic trim tool, NOT a flathead—scratching the finish means a call back to us for a touch-up panel), disconnect the wiring harnesses from the back, label every wire with painter’s tape and a marker if the old labels are faded. I tell our installers to write things like "Door close button wire" or "Floor 3 indicator" so you don’t mix them up later. Then, clean the mounting area: wipe down with isopropyl alcohol to get rid of dust, old adhesive, or grime. If the old backplate is rusted or the mounting holes are stripped, don’t guess—swap that backplate too. We sell those separately for like $25, way cheaper than fixing a wobbly COP that falls off 3 months later.
Step two: Run and connect the wiring. This is where a lot of new installers mess up, especially with newer Fuji models that have CAN-bus wiring (the thin, color-coded harnesses that replace old point-to-point wires). First, feed the new harness through the mounting hole you just prepped—don’t yank it through, that can snap the internal wires or damage the connectors at the controller end. Match the labeled wires from the old part to the new one (always go by wire color AND function, not just the old label—some 2021 models swapped red and blue for certain buttons). Once you’ve got them matched, plug in the connectors firmly, but don’t force them—if they don’t click into place, check for bent pins. If it’s a CAN-bus part, you might have to set a small DIP switch or use the elevator’s service mode to assign the new part an address—we include a cheat sheet for every part, so don’t skip reading that. Quick tip: wrap loose wiring in electrical tape or cable ties to keep it from snagging on the car door or moving parts when the lift is running.
Step three: Mount the part securely. Depending on what you’re installing, this changes a bit, but the general rule is tight but not over-tight. For panel mounts, line the backplate up with the pre-drilled holes on the car wall or trim, then thread the screws in by hand first to make sure they’re not cross-threaded. A lot of installers use the old screws, but new OEM screws have a special coating that prevents vibration loosening—we send those with every part, so use the new ones. For larger parts like car ventilation grilles or weight sensors on the car floor, make sure there’s no gap between the part and the mounting surface. If there is, that’s a sign the backplate is misaligned, not the part itself—adjust the backplate before tightening all screws. I see people over-tightening all the time, which strips the holes or cracks plastic panels—follow the torque specs we include (usually 8-10 lb-in for small panels, 15 lb-in for weight sensors) and you’re golden.
Step four: Test before closing up. This is the most important step, hands down. Don’t just mount the part and then turn the power on—test it step by step. First, double-check that all connectors are plugged in tight and no loose wiring is near power parts. Then, go to the car top or the hall station service panel, turn on the main power (still keeping the DO NOT OPERATE sign up, just power on for testing), and put the elevator in service mode. Test every function of the new part: press all buttons, make sure the floor indicator lights up correctly, check the intercom or speaker if you installed that, test the door close/Open function if it’s a COP. If something’s not working, don’t assume you wired it wrong—check the DIP switch address, make sure you matched the right wires, and if it’s still broken, reach out to us immediately. We have a tech team on call during business hours who can walk you through diagnostics way faster than you googling a random forum post. Once everything checks out, turn the power back OFF before you close up the trim.
Step five: Final checks and clean-up. Now that the part works, put the outer trim cover back on (make sure it snaps into place evenly—no uneven gaps on the edges), remove the lockout/tagout padlock from the main power, take down the DO NOT OPERATE sign, and do a full system test: run the elevator up 2 floors, down 2, press a random button on each floor, check that the indicator matches, and make sure the part is secure (give it a gentle tug to make sure it doesn’t move). Then, clean up any leftover parts—old screws, extra wire, empty packaging—and leave the area as clean as you found it. If you have leftover parts, label them and save them for future maintenance.
A quick note for installers working on older Fuji/FUJITEC models (pre-2015, like the VF series or old Alpha lines): these don’t have CAN-bus wiring, so the wiring step is a bit simpler, but the wire sizes are a bit thicker, so you’ll need a slightly bigger screwdriver for the terminal screws. Also, for older weight sensors, make sure you calibrate them after replacing—most models use the service mode to enter calibration, and we include a step-by-step for that too.
If you’re a facility manager or independent installer, we stock every FUJITEC/Fuji elevator car part you could need—COPs, floor indicators, button panels, intercoms, weight sensors, even the plastic trim covers. We ship most orders within 2 business days, and if you ever run into a problem with an installation, our tech team is here to help, no runaround. If you need bulk parts for a building with multiple lifts, we offer discounted pricing for regular clients too.

If you have questions about a specific part model or your elevator setup, hit us up to connect and chat through your needs. We’re here to make sure your lifts run safe and smooth, no stress.
Elevator Parts for SJEC References: 1. FUJITEC Global Service & Support Guide: Car Part Installation Protocols (2021)
2. Fuji Elevator North America Safety Standards for Component Replacement (2020)
3. Occupational Safety and Health Administration (OSHA) Lockout/Tagout Requirements for Elevator Maintenance (2022)
4. Elevator World Independent Installer Best Practices for Fuji/FUJITEC Parts (2023)
Shaanxi Nona Elevator Parts Co., Ltd.
As one of the leading elevator parts for fujitec/fuji manufacturers and suppliers in China, we warmly welcome you to wholesale bulk elevator parts for fujitec/fuji in stock here from our factory. All elevator parts are with high quality and competitive price. For pricelist, contact us now.
Address: No.1502 Ronghao Building, Xi’an City, Shaanxi Province, China
E-mail: candice@nonaelevator.com
WebSite: https://www.nonaelevatorparts.com/
